Ready to go.
Ready to go again. This time in New Zealand.
The adventure begins again

My Langstroth Hive.
Bees will be buzzing around our garden once again in the not too distant future.
I bought a Langstroth hive from the UK when we moved back to New Zealand. It is made from Red Cedar which is naturally rot resistant. Hives in New Zealand tend to be made of pine or similar and need treating and looking after much more than red cedar. On our household declaration to the Ministry of Agriculture we had to declare we had a beehive even though it was still in kit form and contained no bee products, just wood. That rang the alarms in New Zealand who are quite rightly very protective of their own flora and fauna. The kit was inspected top to bottom and released.
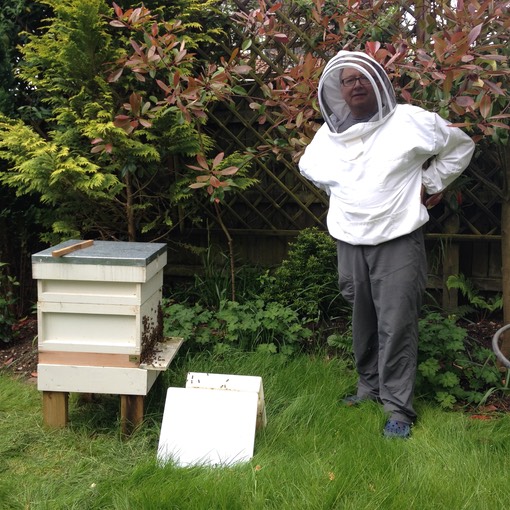
Here it is after having been assembled and painted in undercoat. The red cedar can be left but will go grey in the sun. It can be oiled with boiled linseed oil. In New Zealand boxes are dipped in paraffin wax to treat them. We decided to paint ours to become a garden feature.
After a few coats of Lavender paint the main nest box called the brood box, lid and legs looks like this. The sloping platform to the right is the landing board. The bees land here before walking up into the hive entrance.
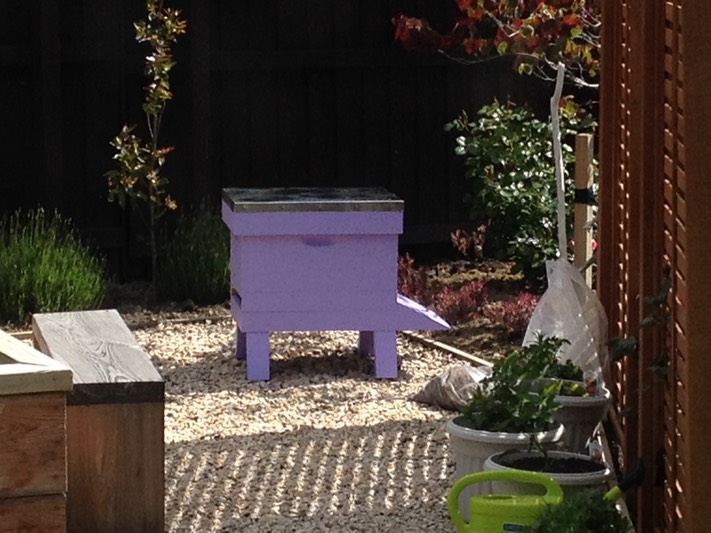
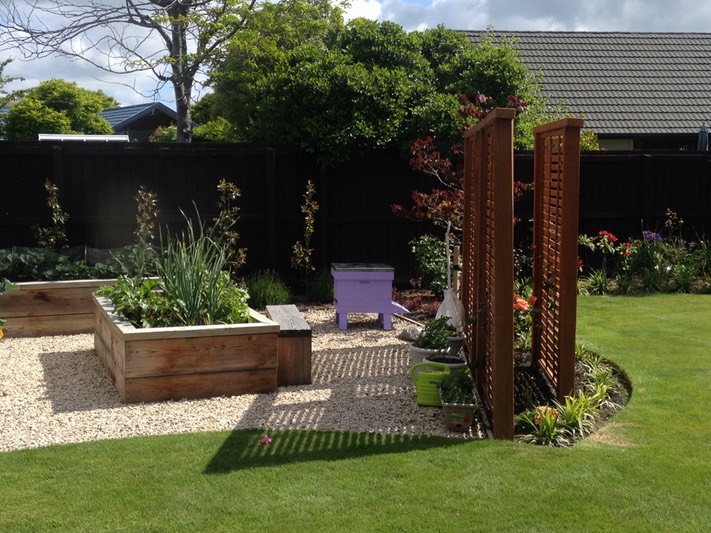
It sits on its own sturdy legs next to the lavender hedge and veggie patch waiting for the bees to arrive.
Our local club has a bee breeder who lives only 20 minutes from us. We have ordered a queen and bees from him. Bees used to the local environment should settle in nicely. They should arrive towards the end of the month. So now we wait.
We won’t get any honey this year. 2015/2016 will be all about establishing the colony and getting it strong ready for winter. Dont forget this is the southern hemisphere. We are approaching summer.
In the meantime I have been reading up in my books and of course Youtube contains much beekeeping information to watch.
Come back later to see how we progress.
The Harvest.

The little darlings! This is the hive entrance. Bees are still collecting pollen. You can see the little blobs of yellow on their hind legs.
Harvesting honey in October is late. I would normally be doing this in august or September at the latest. I was at sea and had to wait until I got home to enlist the help of my cousin Steve to get the honey. The danger of leaving it this late in the year is that the honey can crystallise on the comb and make it very very difficult to extract if at all. Late flowers include ivy which makes honey that is very prone to crystallisation and we did end up with some. I will point it out on the photos as we go. All is not lost. I will leave honeycomb with crystallised honey as food for the bees over winter. They will eat it. So this is how it is done.
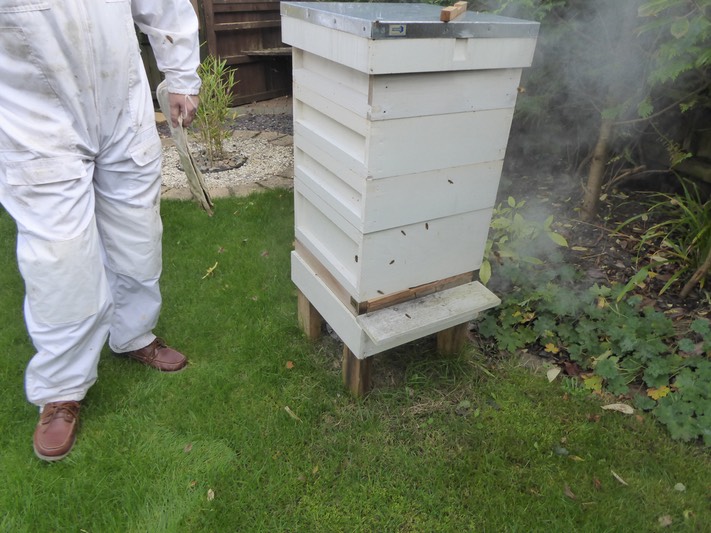
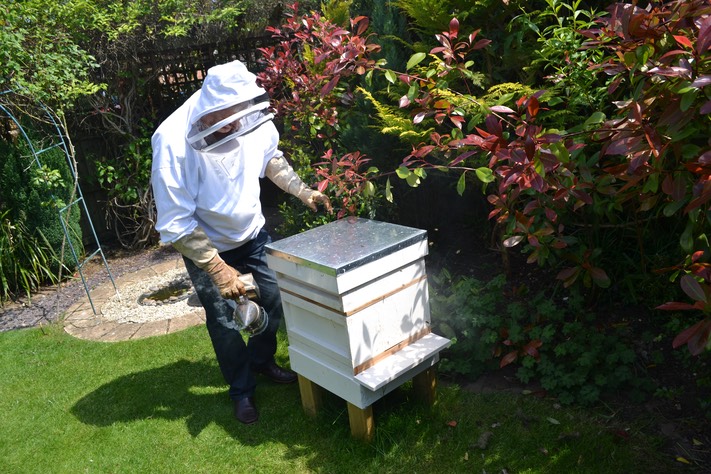
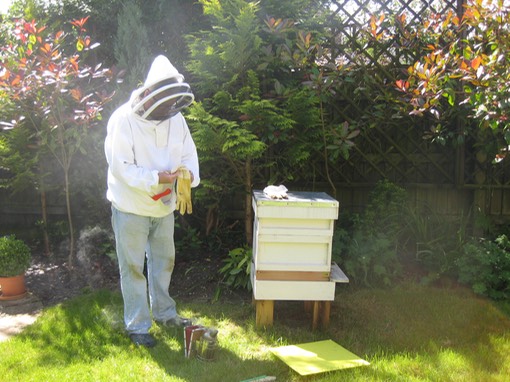
A few puffs of smoke calm the bees ready to open up the hive.
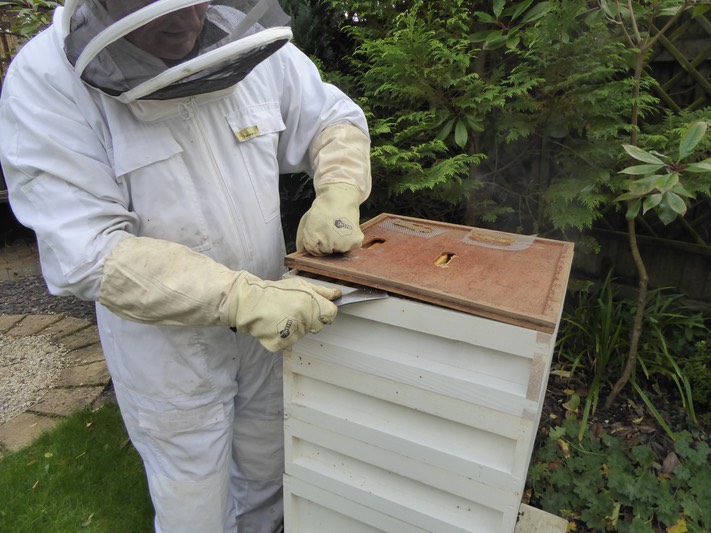
The roof is taken off. The crown board is removed. This is the very top of the hive. The bees are underneath this.

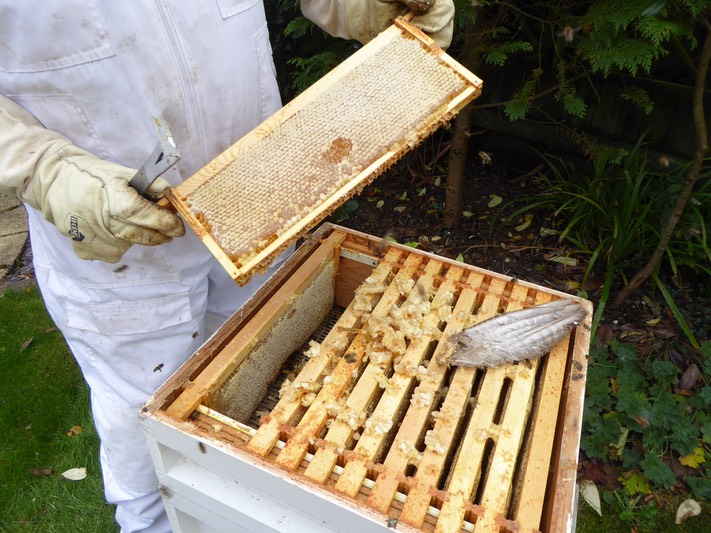
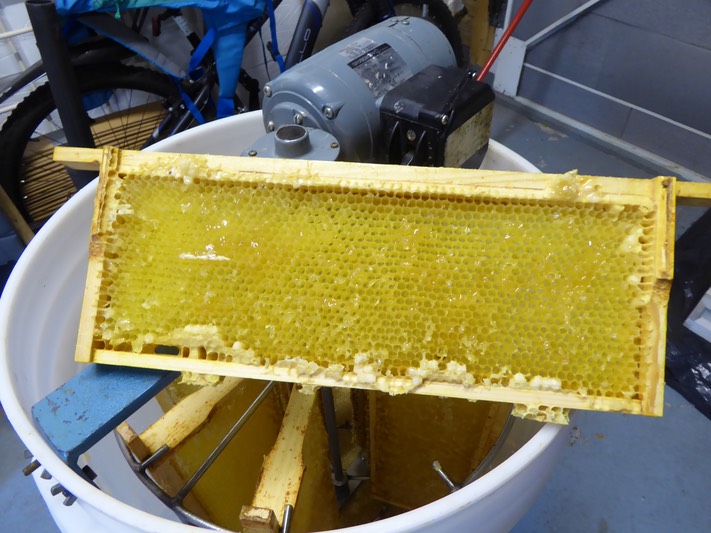
Under the crown board lies the boxes holding the frames of honeycomb in which is the honey. Here Steve uses a flat blade to lever out one of the frames that hold the honeycomb to check that there is indeed honey to be harvested. Each box contains 12 of these frames and we have 3 boxes.
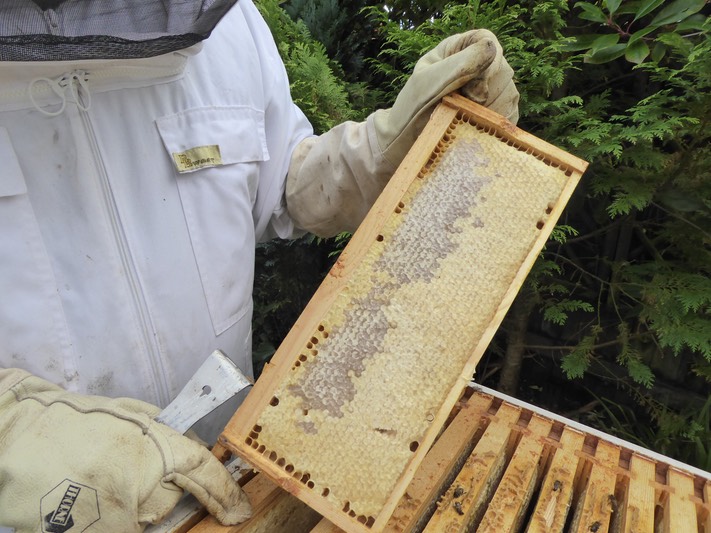
Here is the first frame taken out. Its not looking good. The light yellow area is crystallised honey. We can’t get that out. The darker area nearer Steve is the capped honey in the comb with a light wax capping. A lid to keep the honey in and fresh. That is what we are looking for.
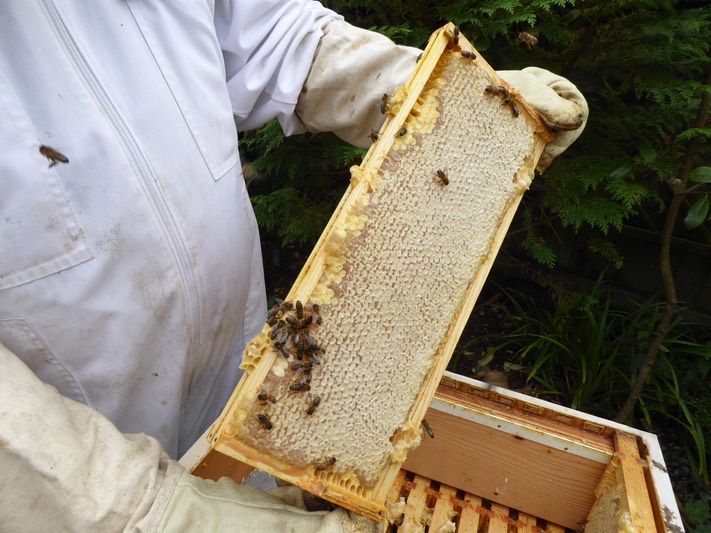
This is a much better frame.This comb is full of honey that we can extract. We need more of these.
Much better. Another full frame. Incidentally the feathers are the wing from a bird. We use it to delicately sweep any remaining bees off the comb without hurting them. Traditionally a goose wing is used. This one is from a duck.
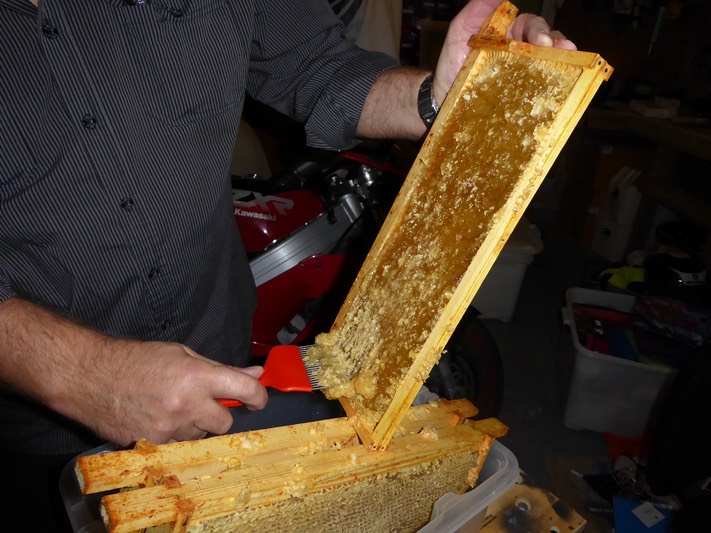
Now we have all the frames collected we retreat into the garage and close the door. The bees can smell the honey and will try to get it back! Here a capping fork which is a basically and long tined implement scrapes the wax caps, the lids off the honeycomb to let the honey held with ooze out.
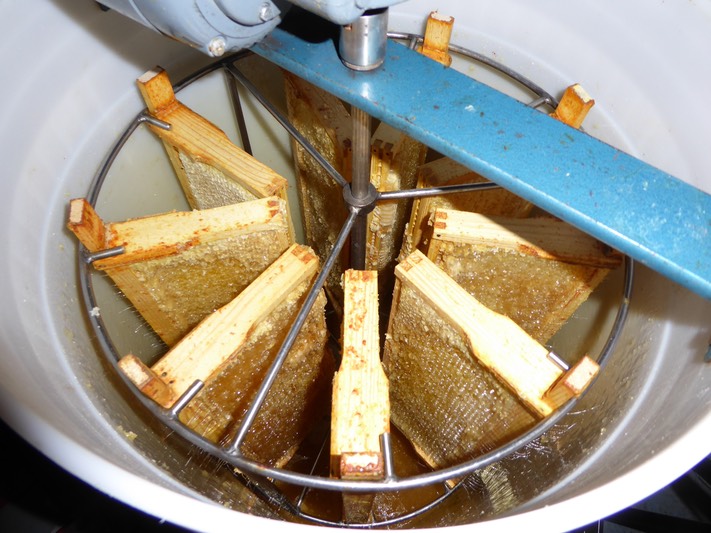
A spinner holds 9 frames of comb. All have been scraped to start the release of the honey.
The spinner rotates the frames at high speed to spin the honey out of the combs.
Here is a frame that has been spun showing all the empty honeycomb cells. We can use this frame again next year. The bees will refill it.
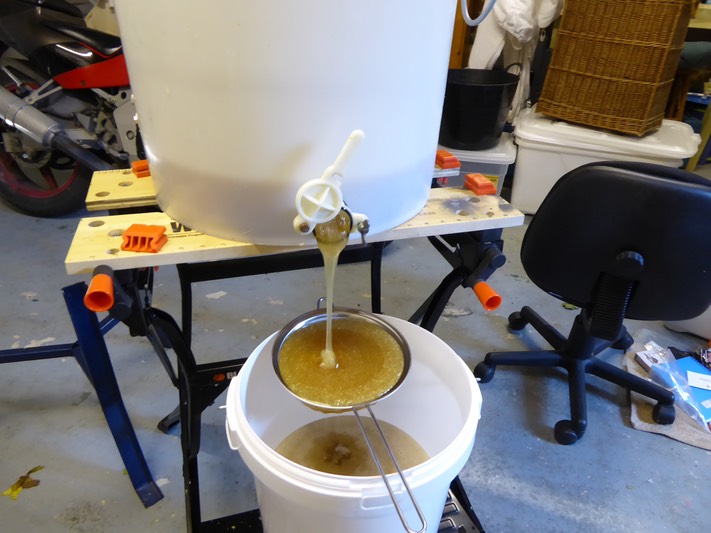
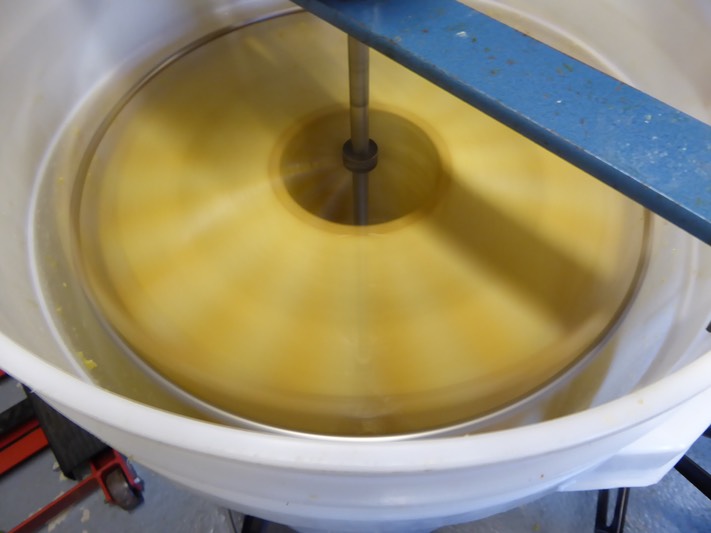
Once all the frames have been spun the honey is then passed through a sieve to remove any remaining wax. The bottom bucket contains pure honey.
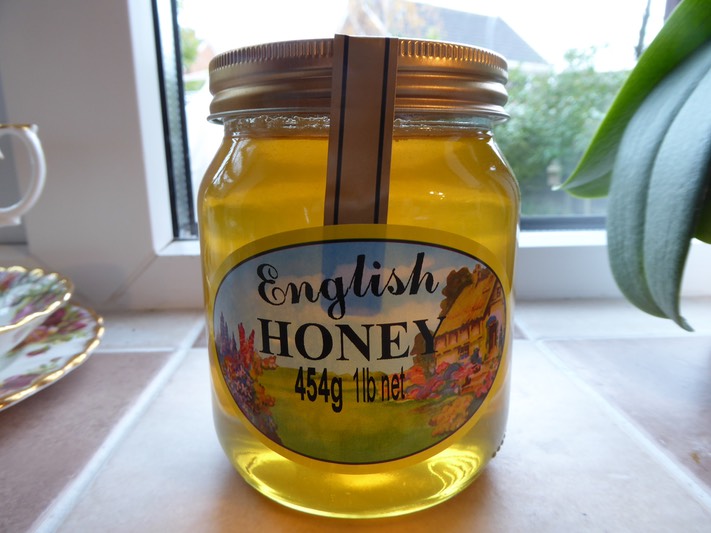
Voila! The finished product. Once we put the honey in jars we apply an anti tamper seal and a label. On the back of the jar is a small label bearing our names and address. Our neighbours always get a jar. After all it is their flowers that contributed to this. The rest we sell to cover our costs. We keep some for ourselves. It is simply divine.
There you have it. Next time you see a jar of honey on the supermarket shelf spare a thought for the bees that gave it too us. The total number of trips the bees have to fly to make this harvest is colossal. The miles flown too and from the flowers are incalculable. But they do it. Each and every year. Bless them. My little pilots.
Queen in residence
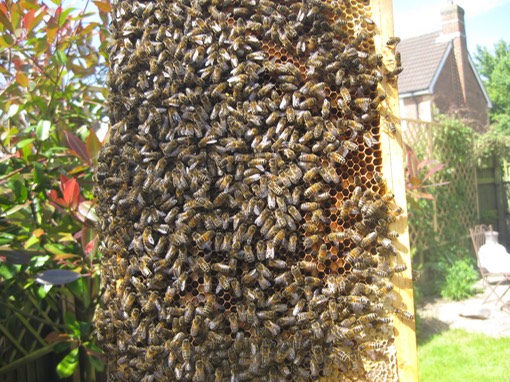
It was time for another hive inspection. I really wanted to confirm that I had a laying queen to ensure the colony would survive. It takes around 3 weeks from the time an egg is laid by the queen to a new bee emerging and at the last inspection I had seen no evidence that an active queen was present. The swarm that flew over the house recently gave me real cause for concern as to whether I had a viable colony left in my hive.
It is important that every time I open the hive up I know the reason for doing so. You dont just open the hive for a look. Unnecessary disturbance of the colony is not welcomed. I wanted to find evidence that I had a laying queen in the hive. So I took the roof and crown board off and then the honey super box followed by the queen excluder giving me access to the lower brood box.
Removing the first few frames and shaking the bees off revealed lots of honey and pollen stores being put away. These are good indicators that he colony is active. On frame 4 from the front I saw what I was looking for. In a number of the comb cells were small white bee grubs curled up to resemble a creamy C in the bottom of the cell. This showed that at least eggs were being laid. On frame 5 I spotted the queen and some more grubs. That was all I needed to see today. The hive was boxed up and I walked away. Within 10 minutes the bees had calmed down. Another good sign that an active queen is present. If she was not the colony would tend to be restless a lot longer. I won’t touch the bees now until I get back from the Camino other than put another honey super on the hive. This is like adding another storey to your house. The family grows and needs more room.
Brood inspection
It has been just over a week since I last inspected the colony. A swarm was spotted recently close by so I wanted to check it was not me that had lost half my colony.
It was a nice and warm day and with light winds only. Ideal for opening up the hive. If it is too cold and you open the hive the bees won’t thank you for it. Armed with my smoker and kitted out I opened the hive up, removed the top super and inspected the brood box. This is where the queen lives and lays her eggs tended by the majority of the colony. The photo below shows the bees on the honeycomb. The white stuff above the bees is the fluffy wax caps that seal the honey in for future use. In the other comb there is honey that has not been sealed yet. All is well so far.
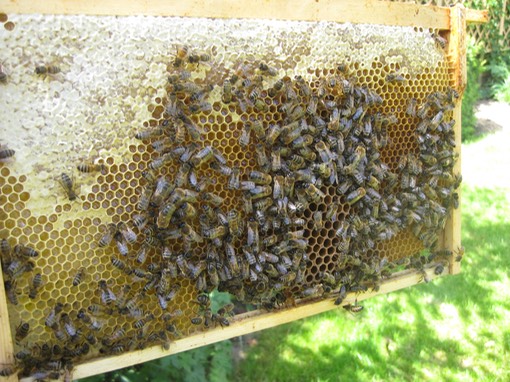
The photo above shows a very busy frame. You can just see some bright orange bits in the honeycomb to the right of the frame. That is pollen that has been collected and deposited by the bees. That is food for the growing family. The inspection showed what I hope is a healthy colony and I will leave it another week before I look again. I could not find the queen or see any eggs in the comb which is a little worrying but I will check for eggs next time. I dont want to disturb the colony for too long.
The beginnings
Last year my cousin Steven finally got me going with something I have been keen about for quite some time, Beekeeping. It has been one of those interests that has been in the back of my mind for many a year. Finally I got around to doing something about it. We bought a National hive in bits from a company called Thornes and I put it together in my garage.
I painted it white and chose a suitable spot in our small back garden. The first year was a huge learning curve and we harvested 40 pounds of honey. We bought jars, produced our own labels and sold it to friends and family to cover my costs. The honey was outstanding.
This year we lost quite a few bees when they swarmed when I was away and since I have been home I have been keeping an eye on them. They seem fine.